

How to ship perishable foods?

1. Choose a fast shipping option. You don't want your goods to spoil en route, but you want to balance speed with cost.
2. Let the gift recipient know when to expect the package. That can help your friend or loved one get the goods into the refrigerator or freezer as soon as possible.
3. Choose the right day to ship. Your shipment will take longer if you ship at the end of the week because it will likely sit in a UPS facility over the weekend. So, ship perishables early in the week.
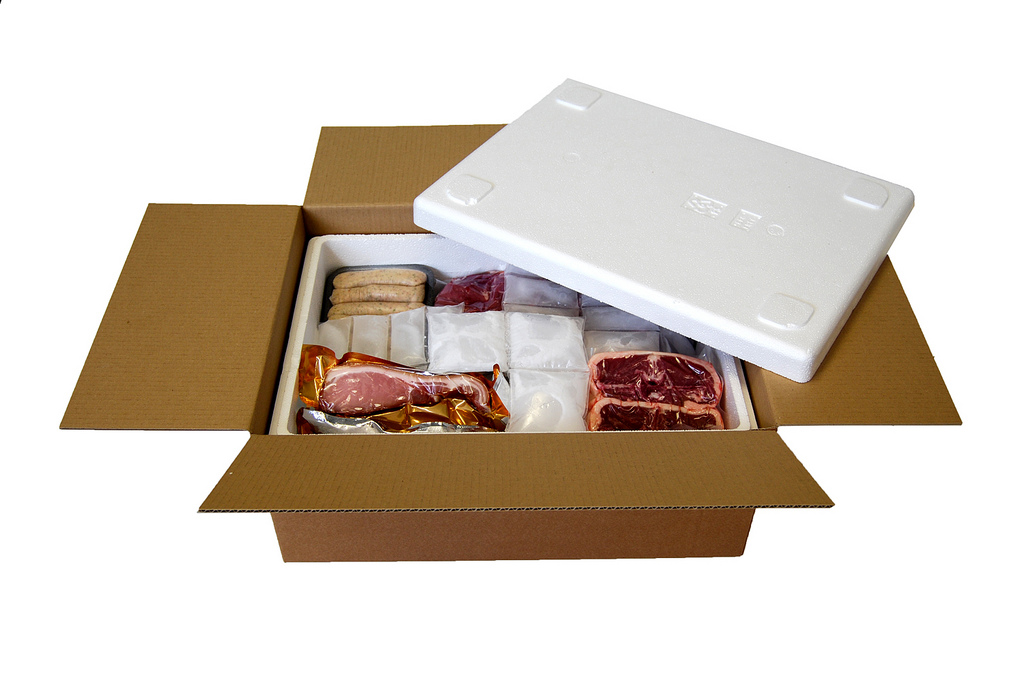
4. Use a sturdy, new corrugated box. Boxes weaken with each use. To get technical: Boxes should have a Mullen Test of at least 200 pounds to perform well when shipping perishables.
5. Wrap foods securely with foil or plastic wrap. This will help keep items intact.
6. Pack items as snugly as possible. Stack items or put them in a tin. Put wax paper between layers of cookies.
7. Protect jars and bottles. UPS recommends at least 2 inches of cushioning around fragile items like glass. And make sure jars and bottles are well sealed.
8. Don't use newspaper as packing material. It doesn't provide enough cushioning. Better options for shipping food are bubble wrap, plastic foam peanuts or Instapak, a bagged foam.
9. Duct tape doesn't solve all problems. Sure, it got MacGyver out of a lot of jams on TV, but duct tape is not a good choice for sealing a package. It comes loose in cold conditions and can melt in high temperatures. Avoid masking tape, too. Use tape that's meant for packages.
10. No brown paper packages tied up with strings!s. Brown paper will tear (and your label could be taken with it) and string gets caught on sorting belts.
11. Insulate cold items with polystyrene foam (such as Styrofoam). Put everything in a cooler and box it up, or use polystyrene planks to build your own "cooler" inside the box.
12. Use dry ice or frozen gel packs to keep foods cold. Dry ice stays cold longer but has safety risks (see tip 13).
13. Remember, dry ice is a hazardous material. It can burn skin, so wear gloves and goggles when handling. Don't wrap it; if the carbon dioxide gas that dry ice releases can't expand, it could explode. Add the proper (allowable per the carrier) amount of dry ice. Place food into a sealed plastic bag and then into the box on top of the dry ice
LATEST NEWS

American Durability: Smokin Brothers Pellet Grills | Michael’s Outdoor Innovations Ep. #1
Welcome to the latest feature on Michael's Outdoor Innovations, proudly brought to you by NTX BBQ Su...

Bacon Wrapped Rack of Lamb Recipe on the GMG
Bacon Wrapped Rack of Lamb RecipeRecipe by: Your Behind BBQIngredients: 1 stick of melted butter for...

Top Outdoor Kitchen Design Considerations
Careful planning and great foresight must go into building an outdoor cooking area. The same conside...

Grilled Mexican Street Corn
Corn is a staple of cookouts, and there’s nothing like biting into a cob of juicy, flavorful corn. O...

Candy Bacon Roses Recipe
Candied Bacon Roses are the sweetest (and most savory) way to show somebody that you really care. No...

Smoked Jalapeno & Gouda Crab Appetizer Dip
Jalapeno & Gouda Crab DipPrep Time: 5 mins / Cook Time: 25 mins This appetizer dip will compleme...